
Most of the time whenever Android users try to flash some custom ROM or want to unlock the bootloader of the phone, at that point you need to Enable Developer Option & Enable USB Debugging on Android. This mode does not only help you to connect your phone to the PC but helps you to send command code to your Android device via fastboot method. By default, this option is disabled on all the Android phone and tablets, and you have to Enable Developer Option & Enable USB Debugging on Android manually. USB Debugging is required by ADB, which is used for rooting, backing up, installing a custom ROM, taking screenshots from computer and more.
The process is very simple and all it takes minutes to enable the developer option and enable USB debugging mode on an Android smartphone. Let us take a look how to that in easy steps.

Enable Developer Option & Enable USB Debugging
Step 1. To get started open the “Settings” Option on your Android smartphone or tablet.

Step 2. Now from the Setting Menu, Select “About Phone” to proceed.

Step 3. Once you are in the About section of the phone. Now scroll to “Build number” and tap it 7 times. After tapping the Build Number 7 times, you will see a message “You are now a developer!”

Step 4. Now go back to Setting menu and you will see the new option “Developer Option”

Step 5. Open the “Developer Option” on your phone and Now Enable Developer Option and USB debugging Mode.

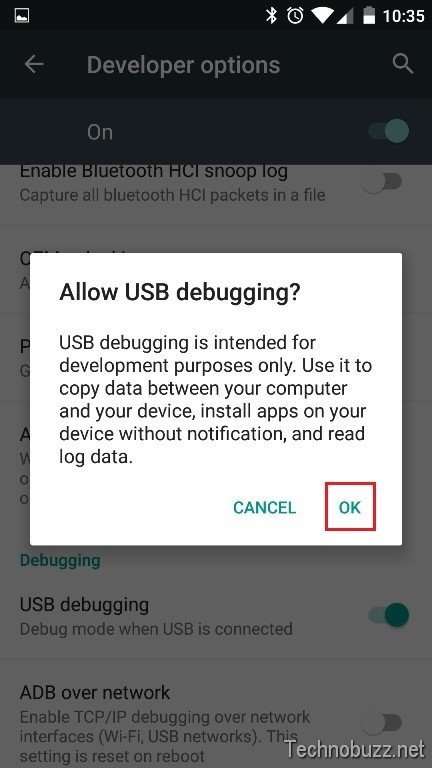
Step 6. Now a Popup will appear on your screen “Allow USB Debugging” Click OK on it.
Why to Enable Developer Option on Android
1) Speed up or disable animations which can make your device seem super fast compared to another android.
2) Enable 2D hardware acceleration to run apps faster
3) Shows status of processes whether they have been running for the whole time or for some time only(Helps with the info from battery usage to find out about new viruses)
4) Tick mock locations and with help of an extra app when your friend looks your stats through google you can take a tour over China, USA, Canada, Argentina, Brazil, UK, France, Spain, India all while sitting at your home.
5) USB debugging enables you to change your password while connected to the computer and a lot more.
6) Show touches and show pointer location gives visual feedback for pointer location and for touches.
7) Show CPU usage -Ticking this shows some data on the top right corner of the processes running and the amount of processor used in the last 1 minute,5 minutes and 15 minutes
Video:-How Enable USB debugging Mode and Developer Mode on Android
.
That’s it; Now the USB mode is enabled on your Android phone. You can use this how-to tutorial guide to enable USB debugging on Any Android phones and Tablets.