
Few days back Google released the developer preview of New OS Android L and the preview is available for the nexus 5 and nexus 7 users, you can use this guide to update your Nexus 5 and 7 device to latest OS. If you recently updates your device with the latest OS and looking for the easiest way to root your device, here is the simplest guide which you can follow on your Nexus 5, 7 and get the root access. All credit goes to the XDA developer Chainfire who released the new script to root Android L Preview. The root procedure is fairly easy, but there are a few prerequisites. First, you’ll need to have a custom recovery installed and after that SuperSu and a script. Rooting is essential to install third-party root apps, latest custom ROMs and system tweaks for optimum performance of the device. If you are interested then read the below mention guide and follow all the steps one by one on your device.
NOTE:- Before following this guide do take the backup of your device and you will lose the warranty of your device after the rooting. Users are advised to proceed at their own risk.

Install Nexus Drivers on Your PC
Download and install the nexus drivers from here. Read here our complete guide how to setup Nexus drivers on your system.
Root Nexus 5 and 7 on Android L Preview
Step 1. First unlock the bootloader of your nexus device. Read our guide here. If you already unlocked the bootloader of your device, then skip this step and move to Step 2.
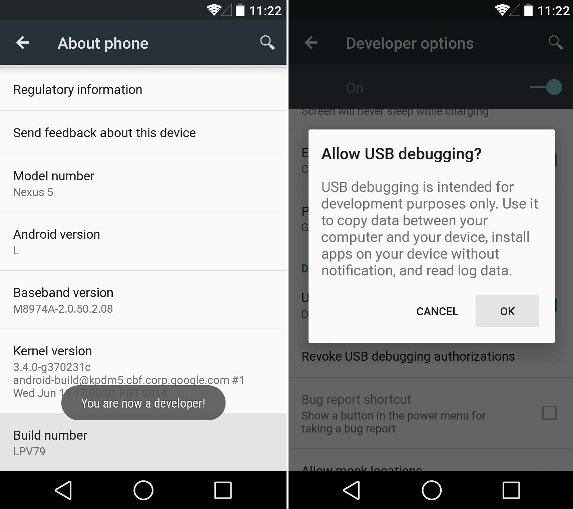
Step 2. Enable USB Debugging, Go to the settings then scroll all the way to the bottom and tap About Phone. In here, scroll down to the bottom again and tap Build Number 7 times. You’ll see a toast message that says You are now a developer. And now go to the Developer Options and tick the box next to USB Debugging, then press OK.
Step 3. Download ADB files (Windows , Mac and Linux) in your computer. Extract the folder on your desktop. In this guide we are using the Windows PC.
Step 4. Download the recovery for your device. I recommend TWRP or Clockworkmod Recovery. Select the Nexus device and download the recovery on your desktop and rename the file to recovery.img
Step 5. Now move the recovery.img file to the ADB folder that you downloaded on Step 3.
Step 6. Switch off your Nexus device and boot in fastboot mode. Nexus 7, users will need to switch off the device and then press the Volume down + Power button. Nexus 5, switch off the device, and then simultaneously press the Volume up + Volume down + Power button. This should get you into Bootloader mode.
Step 7. Connect your device to the PC with USB cable.
Step 8. Open the ADB folder on the desktop and hold SHIFT key on your keyboard and RIGHT CLICK and select “Open command window here”.
Step 9. In the command prompt window, enter the following command:
fastboot flash recovery recovery.img
Step 10. Now this will install the recovery on your device, use the Volume buttons to select the “Restart bootloader” option and press the Power button.
That’s it, Now the recovery is installed and next step is to root the device.
Step 11. Download SuperSU v2.00 (patched for Android L update) and Boot file to fix binary issues: Nexus 5 and Nexus 7 2013
Step 12. Now copy the downloaded SuperSU and Boot files to a safe location on your device.
Step 13. Switch off your device and boot in recovery mode. Press the Volume Down + Power button together until the device shows START written with an arrow around it. Press Volume Down two times until it shows recovery option, Now press the Volume Up key to enter recovery mode.
Step 14. Select Install zip » Choose zip from sdcard » browse to the location where you saved the file and select the SuperSU file. Flash it first and after that flash the Boot file with the same way.
Step 15. Now reboot your device. Go back to the main menu of recovery and select reboot system now.
Your phone will now restart and the first boot may take some time to complete. So, wait until the device boots to the homescreen.