
In our previous articles we showed you how to Setup ADB and Fastboot on Windows With Toolkit and Install ADB Manually on Windows. But all those guide are for the Windows users now today in this guide we will show you how to setup ADB on MAC machines. The guide is pretty simple, and plus you don’t have to worry about drivers like in Windows. All you have to download the the setup file on your MAC and setup them on your MAC. Lets take a look how to do that and how it works on the MAC.

Setup ADB and Fastboot on MAC
Step 1. First make a folder named “android”. You can place it anywhere on your hard drive, it doesn’t really matter. In this guide we created it on the desktop.
Step 2. After this visit the Android developer page here and download the Android SDK.

Step 3. Unzip it and the contents of the “android-sdk-mac_x86” folder into your android folder.
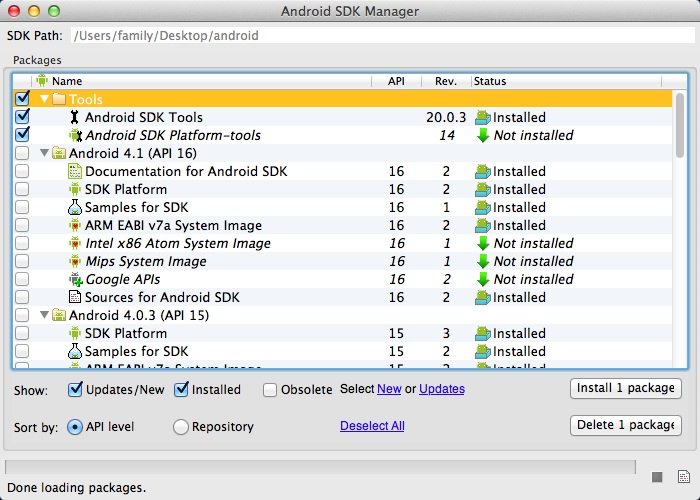
Step 4. Now run the “Android” executable file form the folder. See the screenshot below:-

Step 5. Once it is done, check the folder called tools. Make sure both “Android SDK Tools” and “Android SDK Platform-tools” are selected. After this hit the Install Package button.
Step 6. When they finish downloading, go into the platform-tools folder inside your android folder, then copy adb and fastboot and paste them into the root of your android folder.

That’s it!. Now the Adb and fastboot drivers are installed on your mach and you can run the adb commands on your machine. Now go ahead and plug in your android device at this time. Make sure android debugging is enabled in settings. For more info check out the original thread on XDA here.